With the Nexus Dealmakers Summit set to go in less than a week, the custom-tailored networking platform went live this week.
Attendees are encouraged to log into the event platform ASAP to block off free time, set up profiles, and begin setting up meetings.
Here’s a written guide to using the platform, Jublia, alongside the LendIt video guide. Before we get to Miami, attendees have to:
- Add profile photo
- Add profile description
- Confirm meeting availability
- Set time zone to the US – New York (EST)
- Set up notifications
- Optionally, Sync to calendar
Let’s find out how
By now, the LendIt team should have sent out an email to attendees with login details that looks like:
https://e.jublia.com/LendItFintechNexus/(account number)
The address opens to the Explore landing page, where you can find quick links, a welcome video, sponsor announcements, recommended meetings, and upcoming summit events. You can also find the venue floorplan.
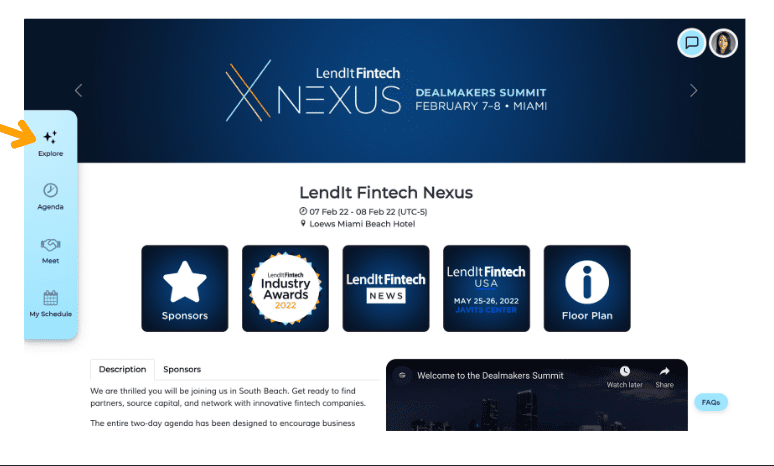
To find the profile section, click the upper right. Then> my profile.
The platform also has a mobile app that attendees can download to stay up to date on the go. After setting up your web app platform, be sure to
download our mobile app, Nexus 2022, available on iOS
and Android.
Update Profile
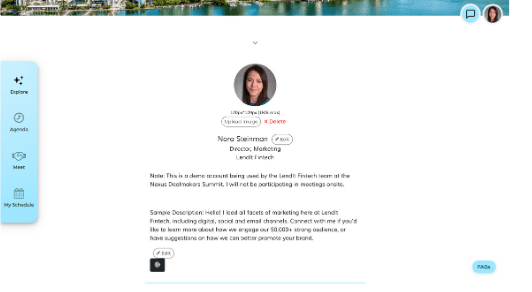
Here, you can upload a profile picture, add a homepage or web platform, and update business info with the edit buttons. Do this as soon as you log in to Nexus to ensure recommended meetings fit your preferences.
Schedule
Next, Use the blue quick links menu on the left side of the screen to get to the My Schedule page. Make sure to update the time blocks with availability for meetings. By default, all slots are set to “available” in yellow. To cross off a time slot, click on it, and it should turn grey and show an “X” mark.

Make sure to set the time zone to US NYC EST, set up notifications to keep on top of events and meetings, and optionally set up the platform to sync with your calendar. Notifications can be edited to update 15 minutes before events and send reminders by text message.
Agenda
The agenda tablets users check out the extracurricular events at Nexus, like morning yoga. Click “Add to schedule” to reserve a spot.
Interests and Search
Before jumping right into meetings, make sure your interests are updated. Click the “Meet” tab on the left menu to ensure the matching service is working as it should. The meeting software sets up match recommendations based on shared “interests” like industry, region, investment amount, and more. Ensure to update the settings you provided when registering for Nexus with “Update Interests.”
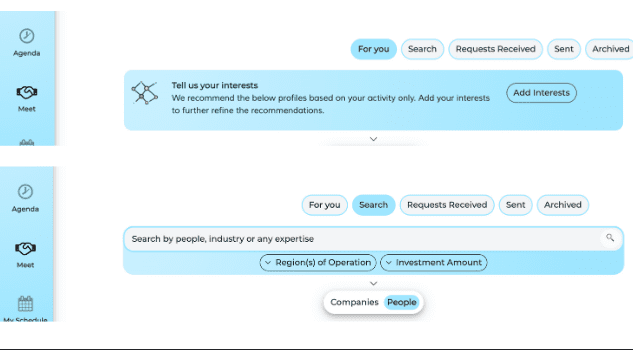
Attendees can also find People and companies through the search system, by the categories “Verticle of Business” or “Regions of Operations.”
Nexus Meetings
Finally, the bread and butter: Find the “meet+” icon on a profile to schedule meetings. In the meeting invitation, you can add a personal note and choose a topic of common interest to break the ice. If they accept the meeting, they will confirm a time, date, and table assignment.
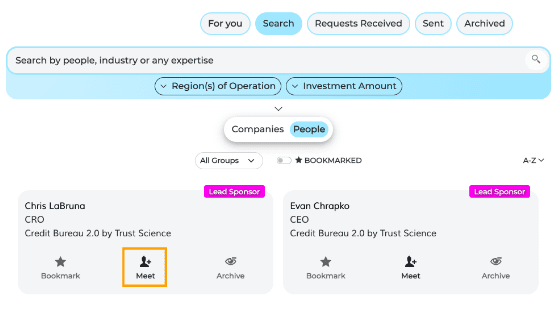
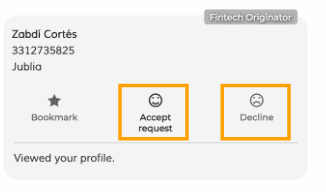
Incoming meeting requests will appear in the “requests Received tab; click “accept request” and find an open time slot on your calendar to set up a conversation. You can also decline requests.
Messaging
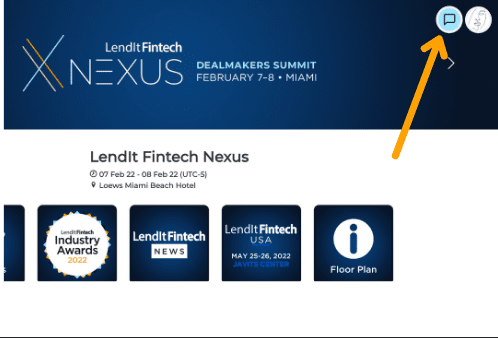
After confirming meetings, you can message other attendees to pitch meeting ideas or connect and say hi before the event. You can find Messages in the upper right hand of the screen at any time.
FAQ
At any time, please email Nexus @ lenti.com for support, but here are a few Frequently Asked Questions and solutions from the Jublia site. We are excited to meet you at Nexus Dealmakers Summit.
How does the networking app work?
The meeting platform was created through a data-driven approach built on the foundation of an intelligent recommendations platform. The main pages are:
Landing Page
- Event’s description and highlighted event
- Quick links to access different event details
- List of recommendation people that is listed as Prospects for you
AGENDA (if applicable)
The Agenda will show the scheduled webinars, and you can bookmark the sessions.
- Click here for more detail about Agenda.
MEET
The meetings tab will prompt you to indicate your interests under For You.
Once you have entered your preferred interests, the platform will automatically surface the most relevant attendees at the top of your list.
- To do your requests, find the articles here.
MY SCHEDULE
Set your time availability and confirm your schedule in My Schedule.
This is so that attendees responding to your meeting requests can choose a time available to set up a meeting successfully.
- To manage your meetings find the articles by clicking here. If you want to start the meeting, you can follow the article here.
The list is long, how do I find relevant people or categories?
If you are having trouble searching through a long list of attendees, we have created a simple way for you to easily multi-filter to narrow down your networking options.
How do I edit my time availability?
To adjust your availability, go to My Schedule and then Time Availability. Just cross or tick by clicking to set your available and unavailable time slots.
- Green: The time is scheduled for your meeting
- Yellow: The time is available for your meeting
- Grey: The time is not available for your meeting
*Important* Please indicate your available meeting slots and confirm your schedule before exploring the platform. This will ensure that all your meetings are scheduled within your available time frame.
Click CONFIRM button to save your time availability.
How to upload your Resume or CV?
If this feature is available to your account, please follow the steps below to upload PDFs:
- Click on profile on the top right > My Profile
- Click on Add PDF as shown below to upload your resume or CV. You could also add your degree certificate(s) or transcripts.
- Type in the title and upload the file then click Save. Please note that the max size of each PDF is 10 MB.
- Once successful, the file will be shown on the page.
- You can preview the PDF that you uploaded by clicking on View
Note: Only PDF files are allowed. Please do not upload anything other than PDF files.
Can I save this meetings app to my phone?
The meetings app is a web-based app that does not require any downloading. You can save the app on your mobile device by following these steps:
For iOS Safari: Tap on the share icon, then select ‘Add to Home Screen.’
For Android, Chrome Mobile: Go to browser menu then select ‘Add to Home Screen.’


